Changing the boot order in BIOS is an essential skill that comes in handy when you need to boot from an external device, such as a USB drive or a CD/DVD. Whether you’re installing a new operating system or troubleshooting issues, adjusting the boot order allows your computer to check specific devices first during startup.
If you’re new to BIOS settings, don’t worry! This guide will walk you through the process in a simple and easy-to-follow manner.
Step 1: Restart Your Computer and Access BIOS
The first thing you need to do is restart your computer and enter the BIOS settings. As soon as your computer turns on, start pressing the F2 or Del key (depending on your system) to enter the BIOS setup.
💡 Tip: The key to access BIOS varies depending on your computer manufacturer. If F2 or Del doesn’t work, try F10, F12, or Esc.
It’s important to act quickly because the BIOS screen only appears for a few seconds before Windows starts loading. If you miss it, simply restart and try again.
Step 2: Navigate the BIOS Setup Utility
Once inside the BIOS, you’ll see a screen that might look different depending on your computer model. Some BIOS interfaces are blue and text-based, while others have a more modern, graphical design.
Don’t worry about how it looks—what matters are the settings you’ll adjust. You’ll typically see a horizontal menu at the top and different hardware options listed on the screen.
💡 Tip: Use the arrow keys to navigate and the Enter key to select options. Instructions for navigation are usually displayed at the bottom of the screen.
Step 3: Locate the Boot Order Settings
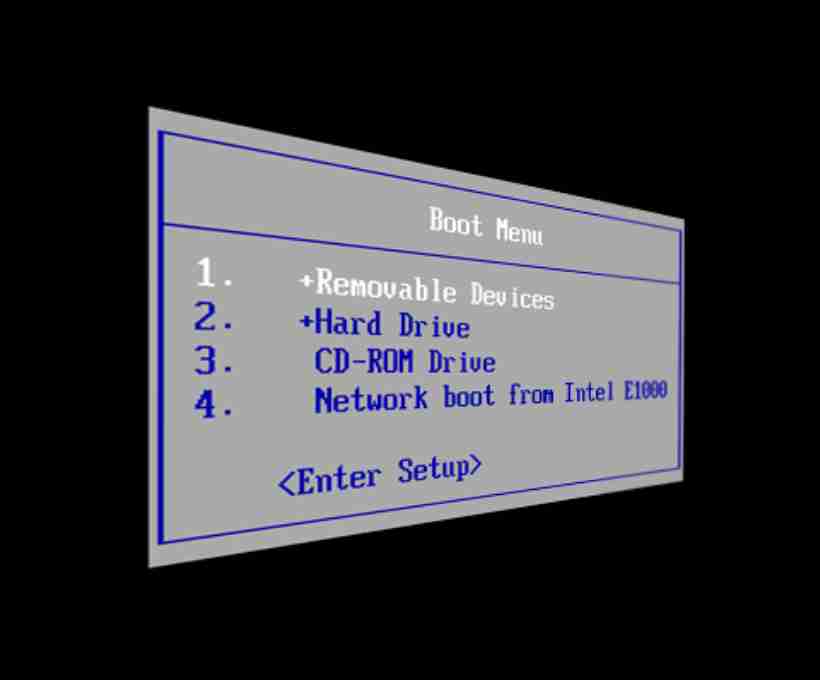
Find and select the Boot tab in the BIOS menu. This section lists all the devices that your computer can boot from, such as:
- Hard Drive (HDD/SSD)
- USB Drive
- CD/DVD Drive
- Network Boot (PXE)
Your system follows this list from top to bottom, checking each device in order. The first device in the list is what your computer will try to boot from first.
Step 4: Change the Boot Order
To change the boot order:
- Highlight the device you want to move.
- Use the + or – keys to rearrange the order (this may vary depending on your BIOS version; some may use F5 and F6 instead).
- Set your preferred boot device to the top.
For example, if you want to boot from a CD first, move the CD/DVD Drive to the top of the list. If you want to boot from a USB, set the USB Drive as the first option.
💡 Tip: If your bootable device is not appearing, make sure it’s properly connected and recognized by the BIOS.
Step 5: Save and Exit BIOS
Once you’ve set the desired boot order, it’s time to save the changes.
- Navigate to the Exit tab.
- Look for the option Exit Saving Changes and select it.
- A confirmation message will pop up asking if you want to save the configuration changes.
- Select Yes to confirm.
💡 Warning: If you exit without saving, all changes will be lost, and the previous boot order will remain in place.
Step 6: Restart Your Computer
Now, restart your computer, and it will follow the new boot order settings. If you’ve set a USB drive or CD as the first boot option, your system will try to boot from that device first.
- If the device is bootable, the system will start loading from it.
- If it’s not bootable, the computer will move to the next device in the list.
And that’s it! You’ve successfully changed your boot order.
Final Thoughts
Changing the boot order in BIOS is a simple yet powerful way to control how your computer starts up. Whether you’re troubleshooting, installing a new OS, or booting from a recovery disk, knowing how to adjust these settings can be incredibly useful.
If you ever need to revert the changes, just follow the same steps and reset the boot order to its original state. Happy computing! 🚀